


MH504 – Securing D365FO MHAX Integration: Utilizing Entra ID and Key Vault Managed Identity for OAuth 2.0 Authentication
Introduction
In today’s digital landscape, securing integrations is paramount to protect sensitive data and ensure seamless operations. This article explores how to enhance the security of D365FO MHAX integration by leveraging Entra ID for OAuth 2.0 authentication and utilizing Key Vault managed identity. While I won’t delve into the step-by-step setup process of key vault managed identity, I’ll highlight the key benefits and considerations of this approach, providing you with a comprehensive understanding of how these technologies can fortify integration’s security.
Register a New Application in Azure AD (Entra ID)
- Sign in to the Azure Portal:
- Go to the Azure Portal and sign in with an account that has permissions to register applications.
- Navigate to Azure AD (Entra ID):
- In the left-hand menu, select Azure Active Directory.
- Register a New Application:
- Under Manage, click App registrations.
- Click New registration.
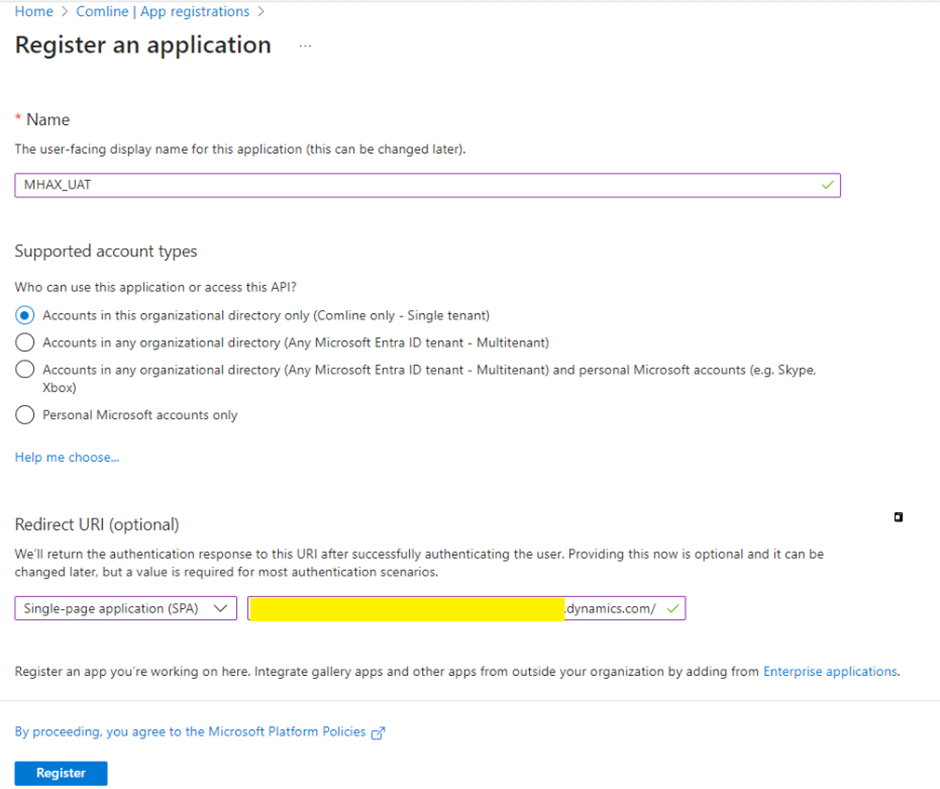
- Configure the Application Registration:
- Name: Enter a name for the application (e.g., “MHAX_UAT”).
- Supported account types: Select Accounts in this organizational directory only (single tenant).
- Redirect URI: Under Redirect URI (optional), select Single-page application (SPA) and enter the redirect URI that points to your Dynamics 365 environment (e.g., https://<your-dynamics-url>/).
- Click Register to create the application.
Create New client Secret
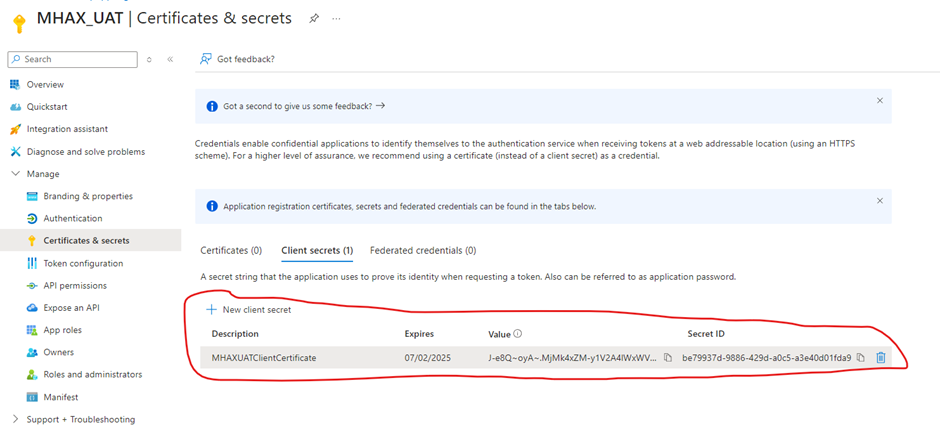
- Create new client secret
- Under Manage, select Certificates & secrets.
- Click +New Client Secret
- Provide appropriate name and set expiry date as per business policy.
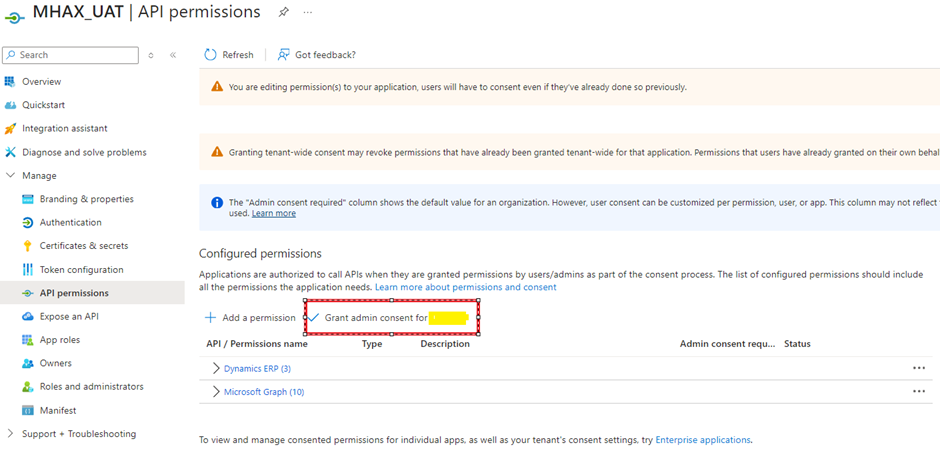
Configure API Permissions
- Add API Permissions:
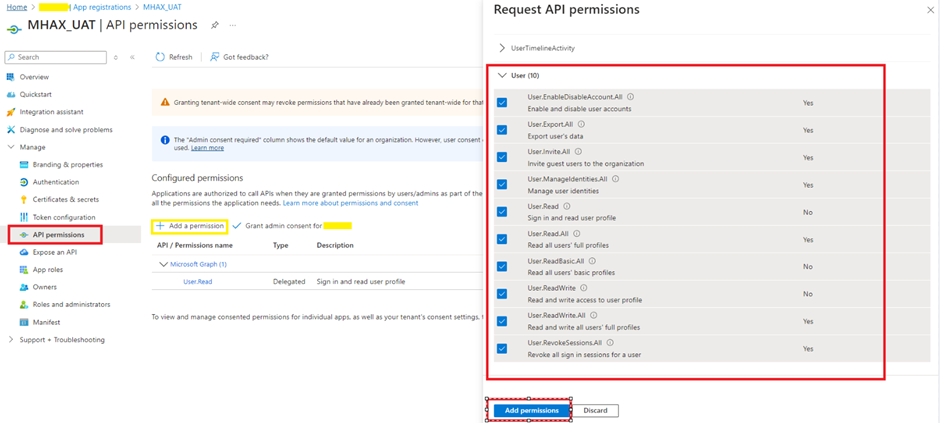
- Under the Azure AD application, select API permissions.
- Click Add a permission.
- Microsoft Graph API Permissions:
- Choose Microsoft Graph.
- Click Delegated permissions
- Search for User and select All the permissions
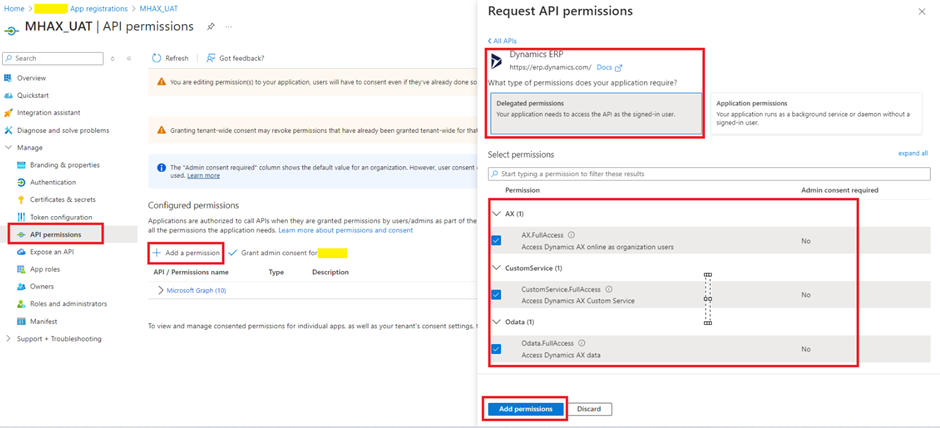
- Dynamics ERP Permissions:
- Choose Microsoft ERP.
- Click Delegated permissions
- select All the permissions
- Grant Admin Consent:
- After adding permissions, click Grant admin consent for <Your Organization> to ensure the permissions are applied.
Configure Authentication in Dynamics 365
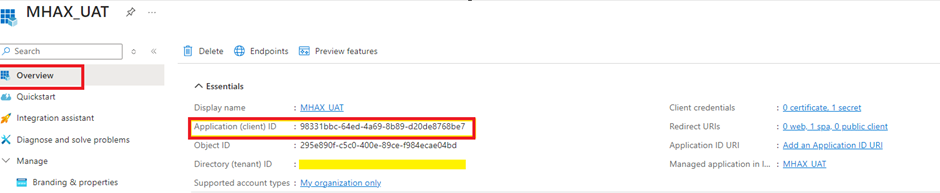
- Get the Client ID:
- Go back to your Azure AD application registration.
- Under Overview, copy the Application (client) ID.
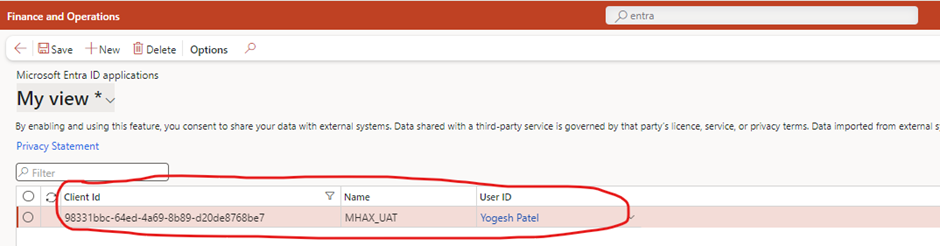
- Configure Dynamics 365:
- Sign in to your Dynamics 365 environment.
- Navigate to Advanced Settings → Settings → Security → Azure Active Directory Applications (new name – EntraID application).
- Click + New to register a new Azure AD application.
- Enter the Application ID you copied from Azure AD and configure any other necessary settings.
Securing Client Secrets with Azure Key Vault
High-Level Steps:
- Create an Azure Key Vault:
- Set up a new Key Vault in Azure to securely store your secrets.
- Store the Entra ID Client Secret:
- Safely store your Entra ID client secret within the Key Vault.
- Assign Permissions to Logic Apps:
- Grant the necessary permissions to your Logic Apps, allowing them to access the stored secret in the Key Vault.
- Integrate Key Vault with Logic Apps:
- Configure your Logic Apps to retrieve and use the secret directly from the Key Vault during runtime.
Expand Your Knowledge: See More Material Handling Blogs
Share this content:


Post Comment