


PP103 – Automated PO Confirmation Notifications in D365FO
Introduction
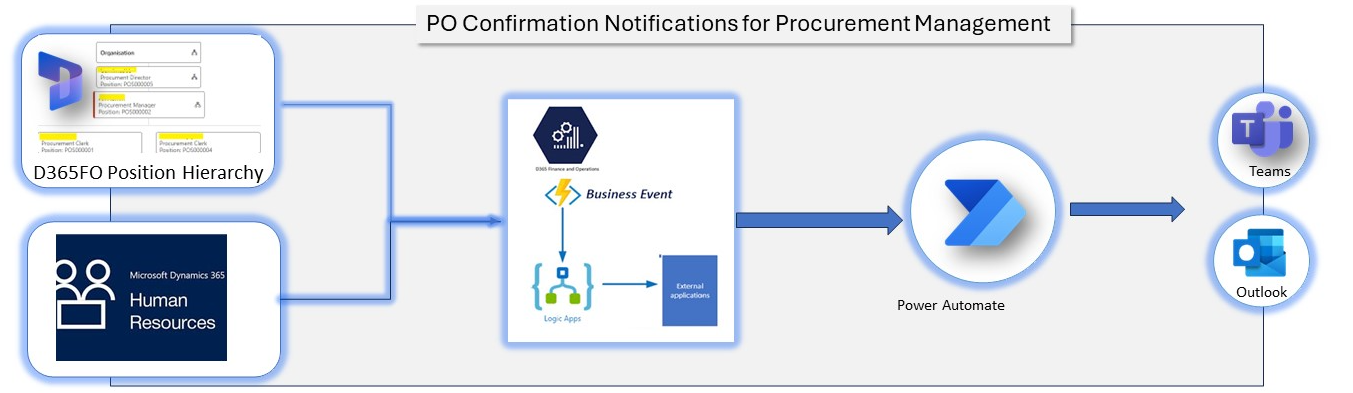
In this article, we will explore how to set up an automated notification system for purchase order (PO) confirmations using Power Automate in conjunction with Dynamics 365 Finance and Operations (D365FO). The goal of this article is to retrieve managerial contact emails by connecting multiple different tables. While I will be taking a more detailed route by setting up conditions at the beginning, feel free to choose the method that best suits your needs.
Please note that I haven’t included extensive details under the “send an email” action. However, you can enhance the notifications by adding relevant information such as the PO amount, supplier name, delivery date, and the number of order lines. This will provide comprehensive insights to the procurement manager and director, facilitating more informed decision-making.
By following these steps, you will be able to create a powerful notification system that keeps your procurement managers and directors well-informed about PO confirmations, ensuring efficient and effective communication within your Organisation.
Step-by-Step Instructions to Create Power Automate Flow
Step 1: Trigger from Business Event
- Create a new flow:
- Open Power Automate.
- Click on Create and select Automated flow.
2. Set the trigger:
- Search for When a Business Event occurs.
- Select this trigger and click Create.
3. Configure the trigger:
- Instance: Dynamics Environment URL
- Category: Purchase Orders
- Business Event: Select Purchase Order confirmed
- Advanced Parameter : Select Legal Entity (Optional)
Step 2: Parse Data from Event
- Add Parse JSON action:
- Click on + New step.
- Search for Parse JSON and select it.
2. Configure the Parse JSON action:
- Content: Select Body from the trigger output.
- Schema: Click on Generate from sample, and provide a sample JSON payload that matches the expected structure of the business event data. For example:
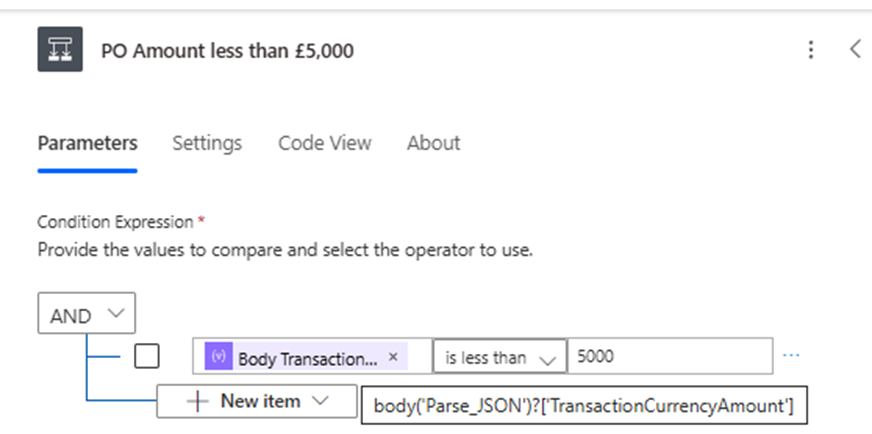
Step 3: Add Condition
- Condition is to run notification based on PO Amount
Step 4: Configure True Condition
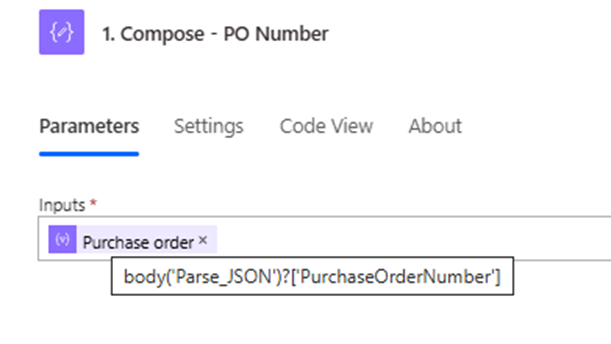
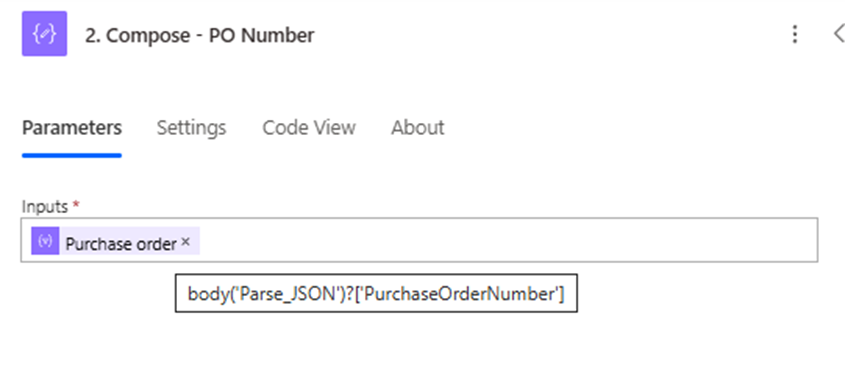
Step 4.1: Compose PO Number
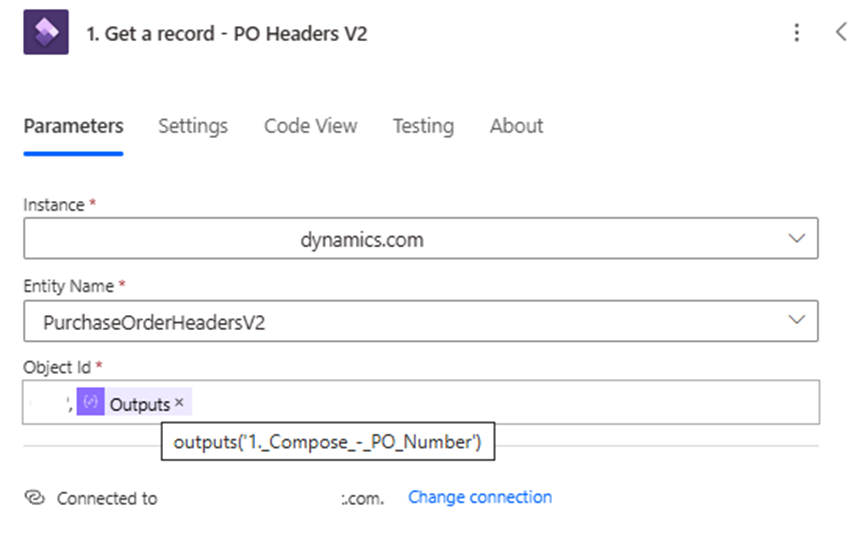
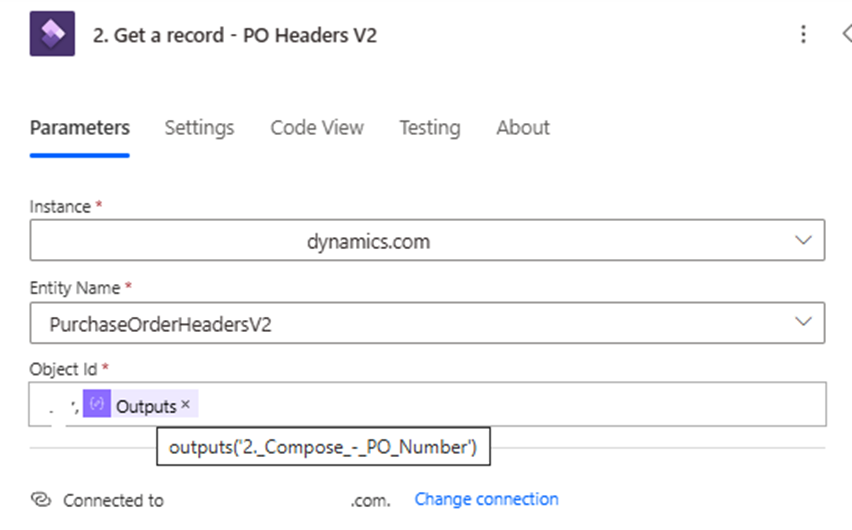
Step 4.2: Get PO Record
Include Legal entity ID under object ID followed by comma and outputs
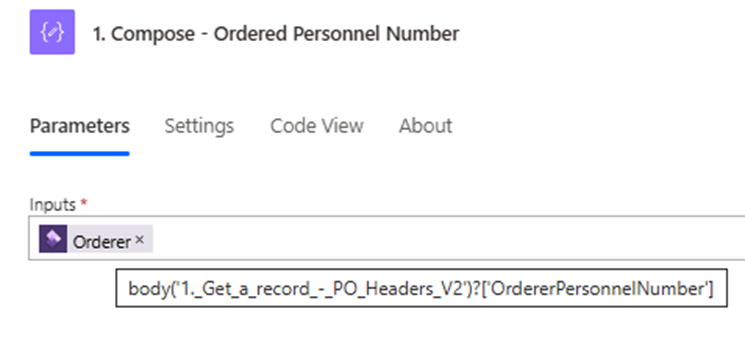
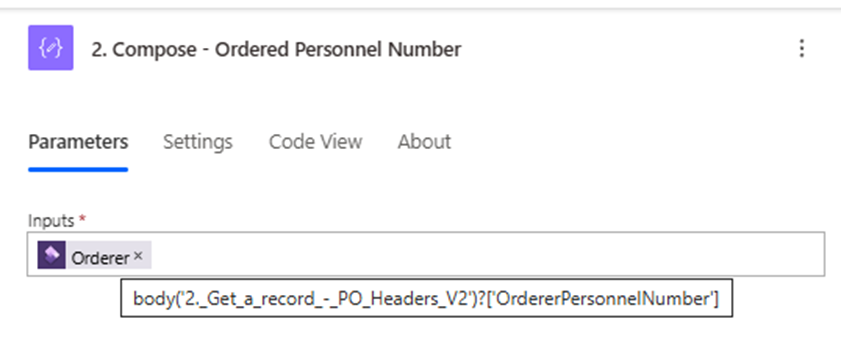
Step 4.3: Compose Orderer Personnel Number
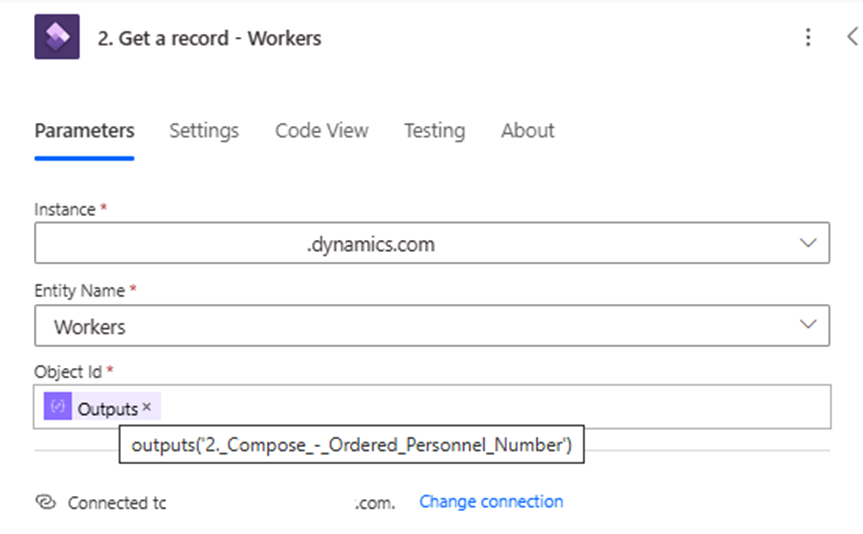
Step 4.4: Get Worker Record

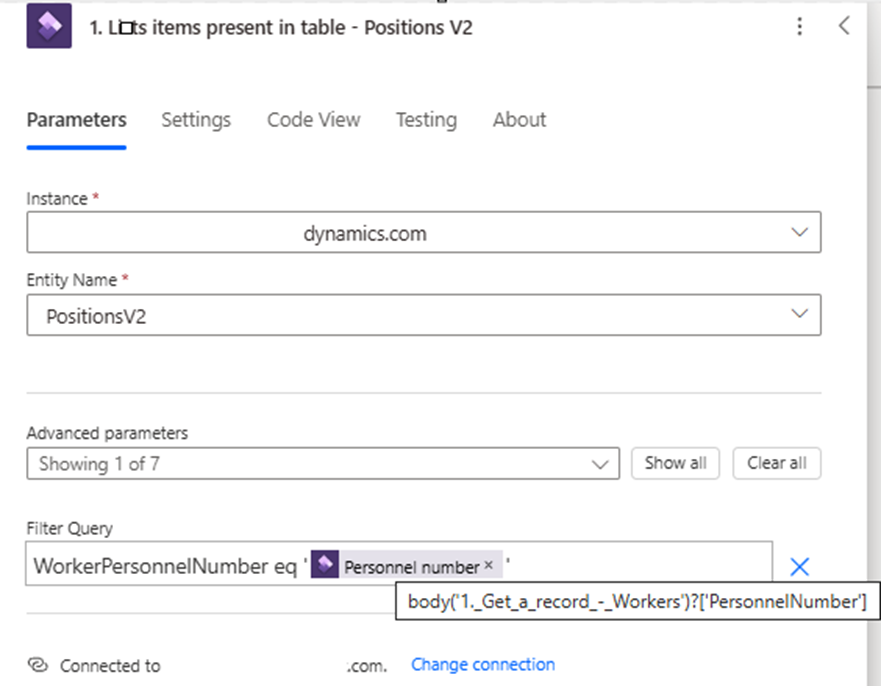
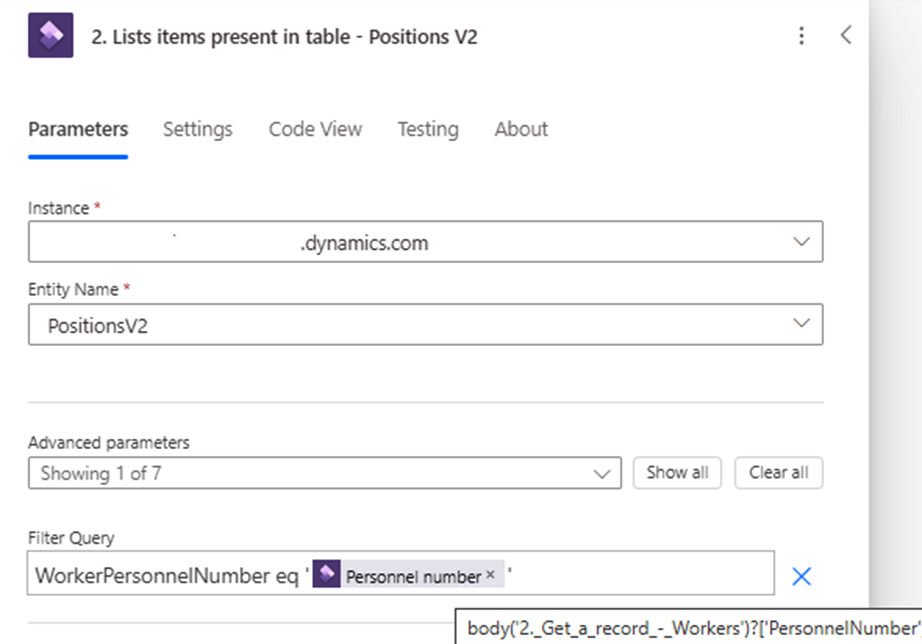
Step 4.5: List Items in Position Table
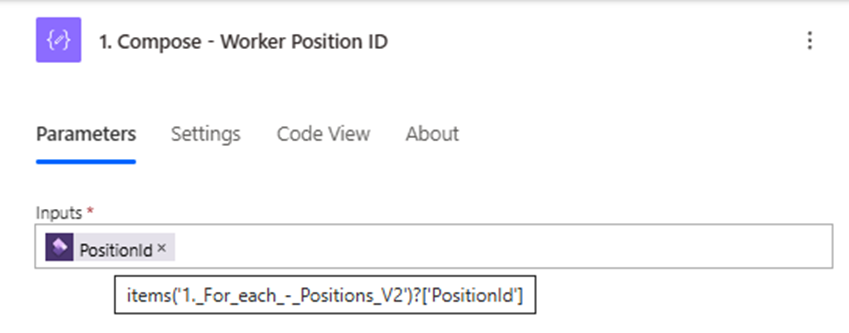
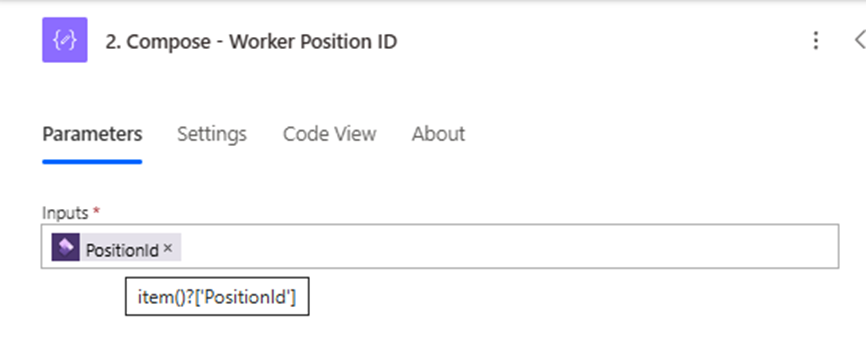
Step 4.6: Compose Woker Position ID
Note – compose action will create foreach branch
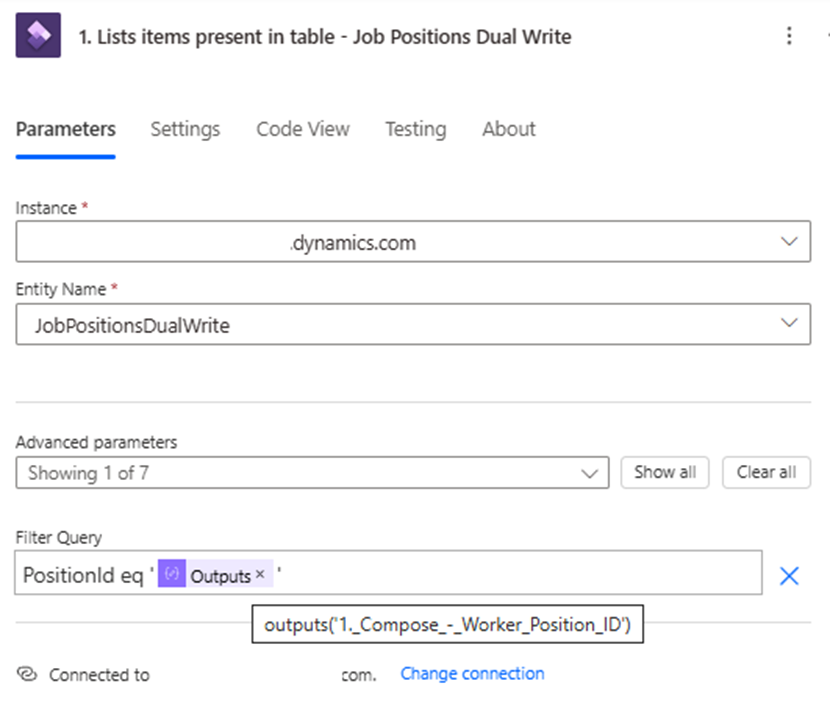
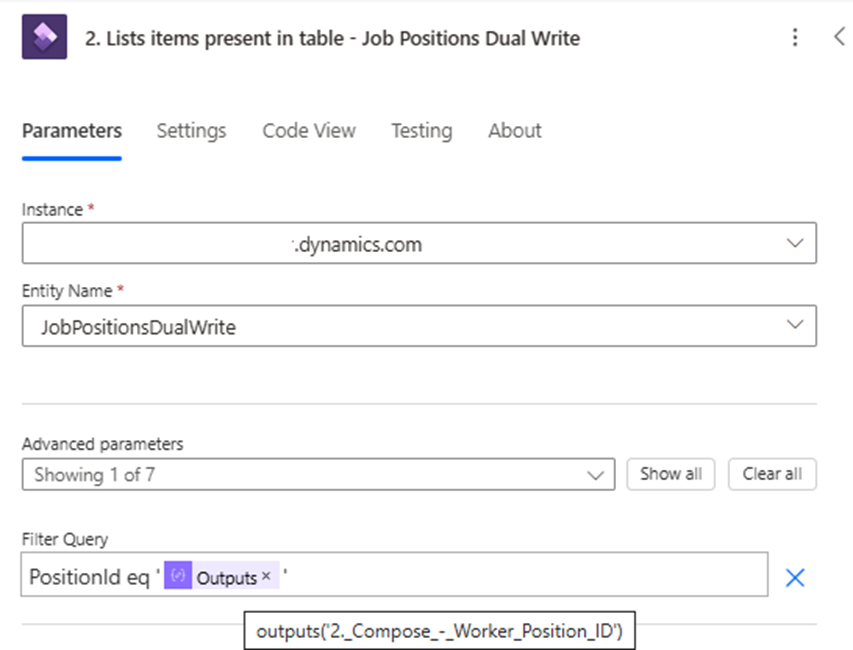
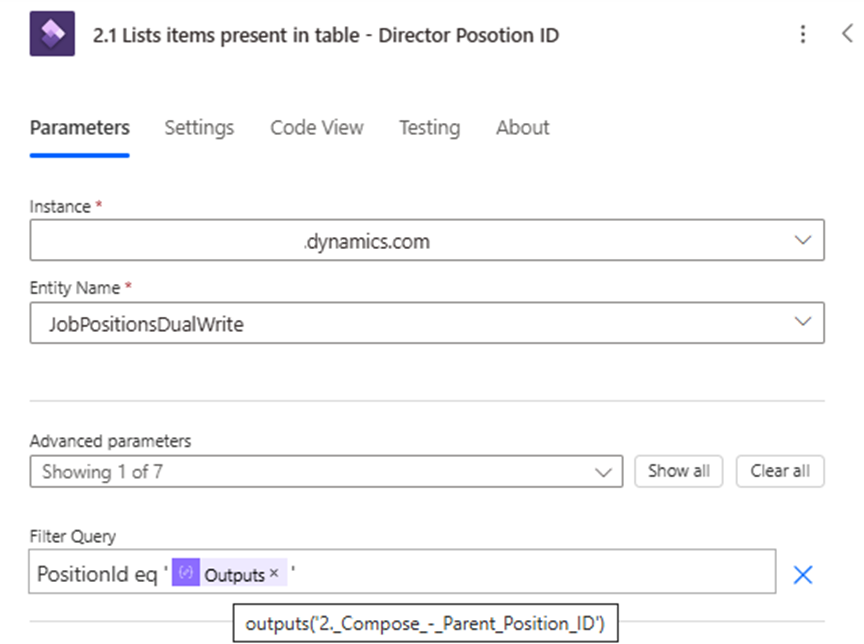
Step 4.7: List Position ID from Job Position Dual Write
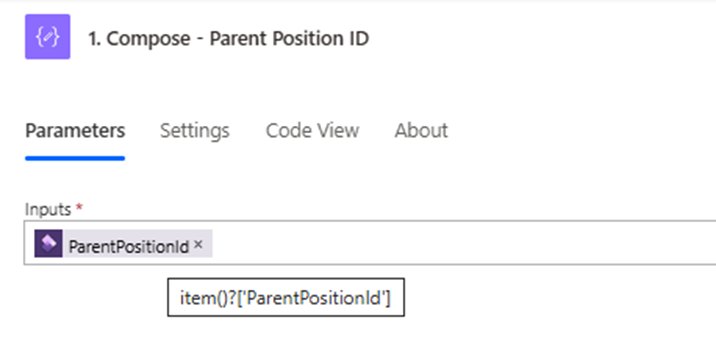
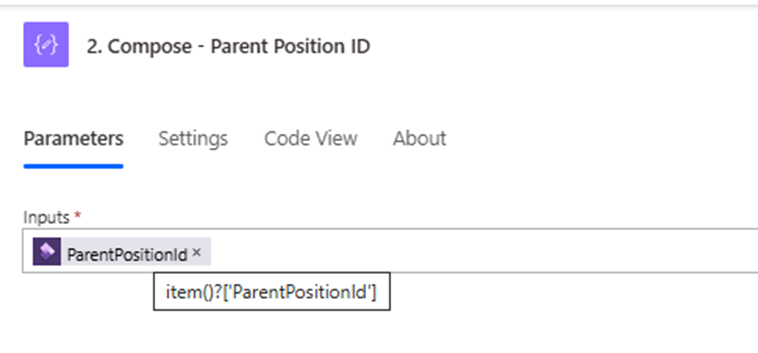
Step 4.8: Compose Parent Position ID
Note – compose action will create foreach branch
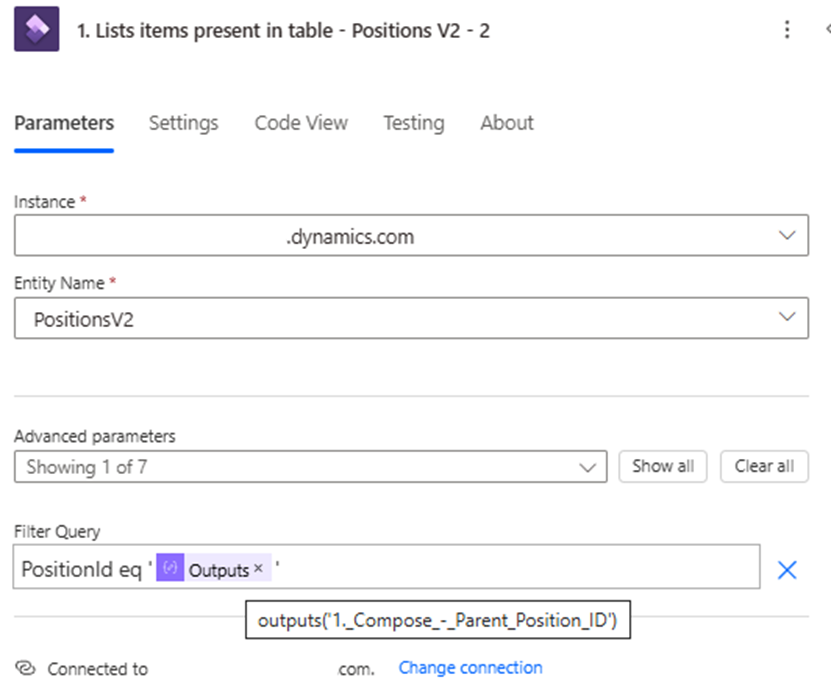
Step 4.9: List Item in Position Table.
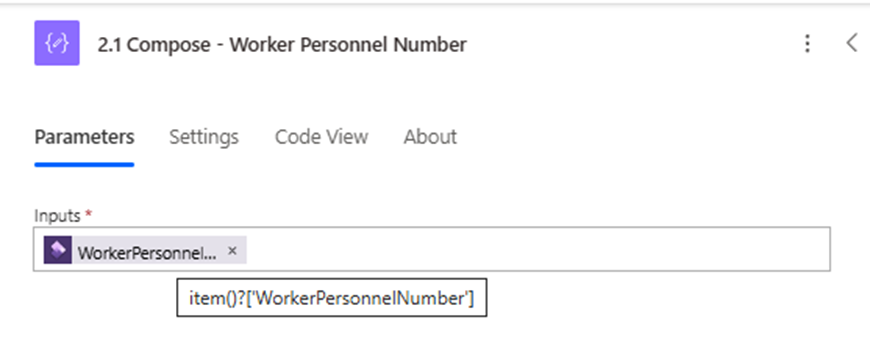
Step 4.10: Compose Personnel Number
Note – compose action will create foreach branch
Step 4.11: List Items in Position Table
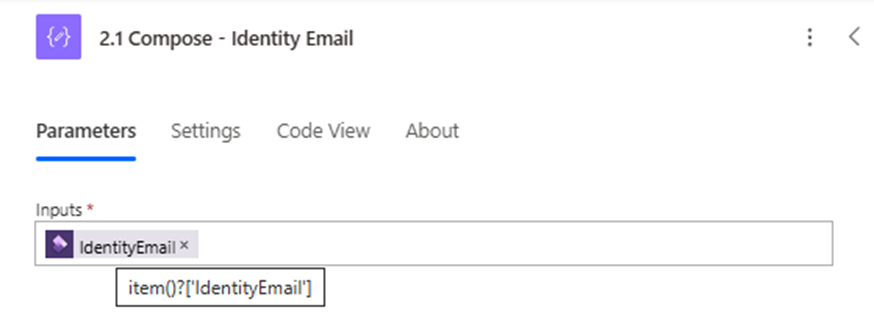
Step 4.12: Compose Identity Email
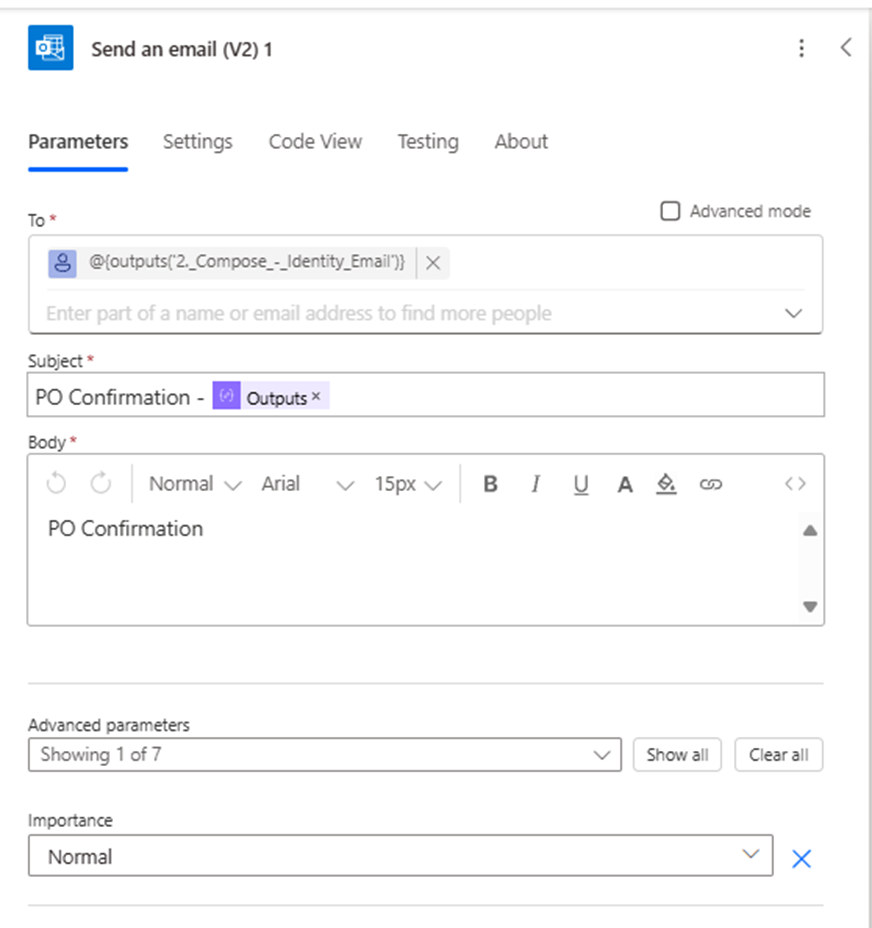
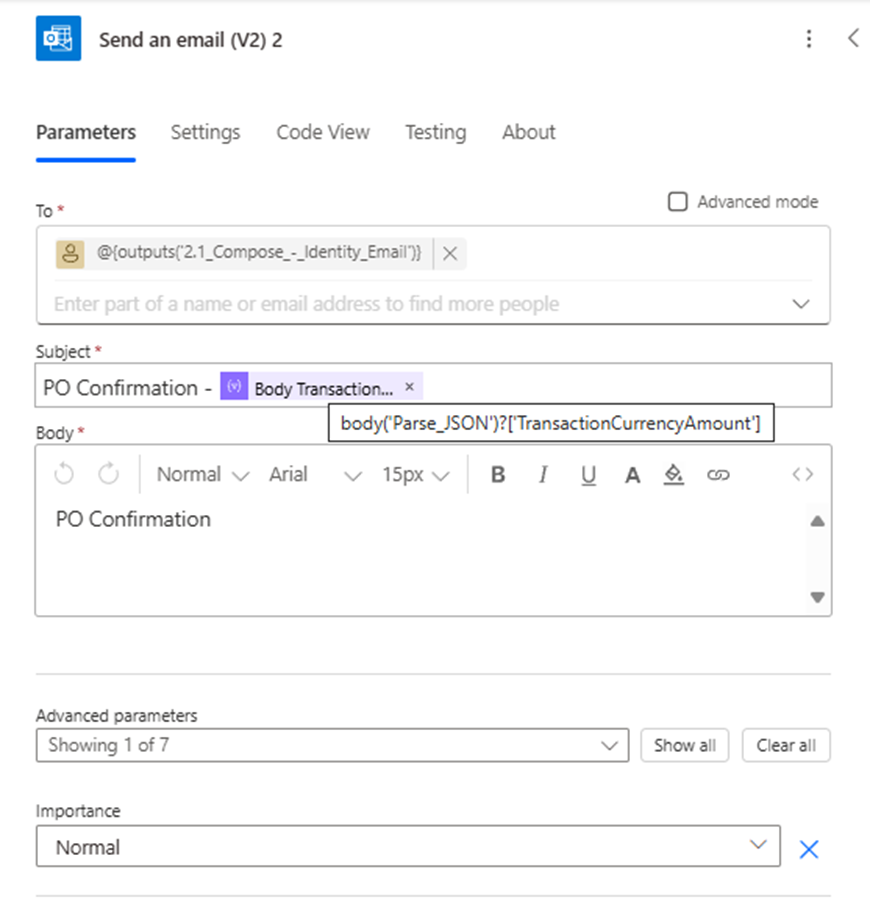
Step 4.13: Send an Email V2
Step 5: Configure Fales Condition
Manager Notification
Step 5.1: Compose PO Number
Step 5.2: Get a PO Record
Include Legal entity ID under object ID followed by comma and outputs
Step 5.3: Compose Orderer Personnel Number
Step 5.4: Get a worker Record
Step 5.5: List Item in Position V2 Table
Step 5.6: Compose Worker Position ID
Note – compose action will create foreach branch
Step 5.7: List Position in Job Position Dual write table
Step 5.8: Compose Parent Position ID
Note – compose action will create foreach branch
Step 5.9: List Item in Position Table
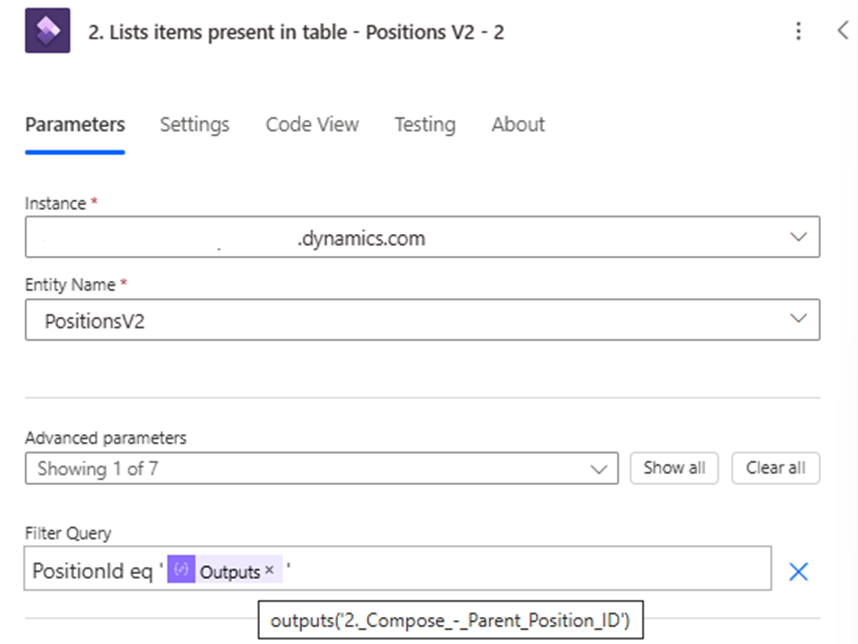
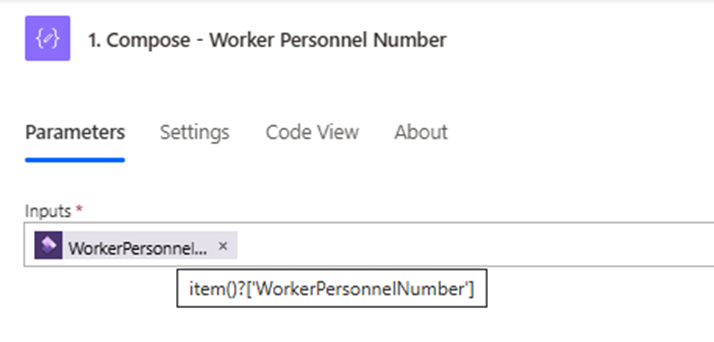
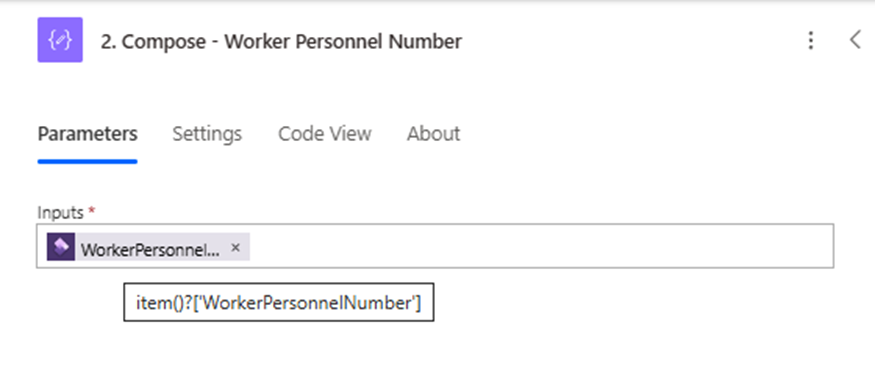
Step 5.10: Compose Worker Personnel Number
Note – compose action will create foreach branch
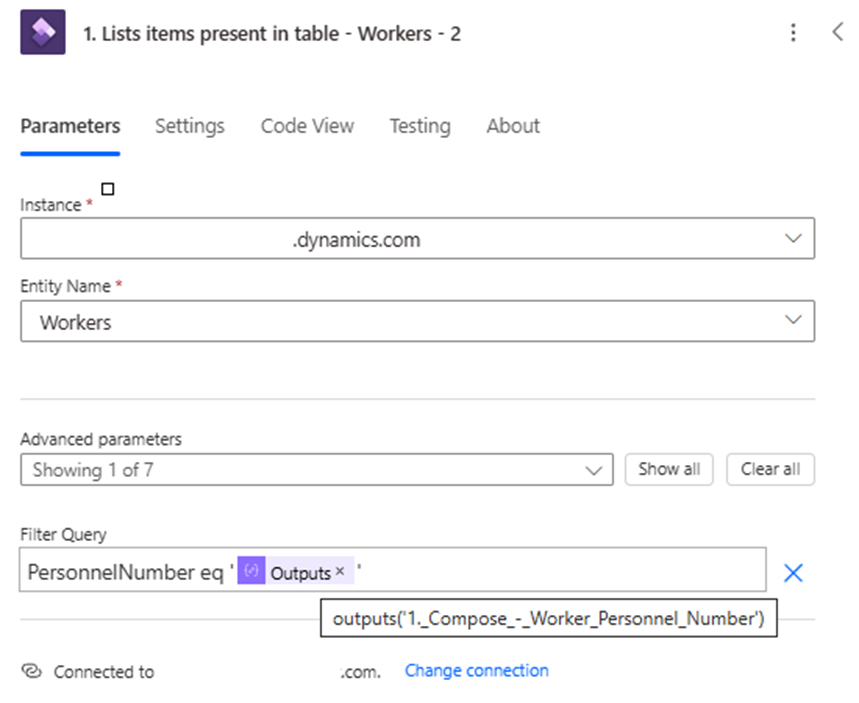
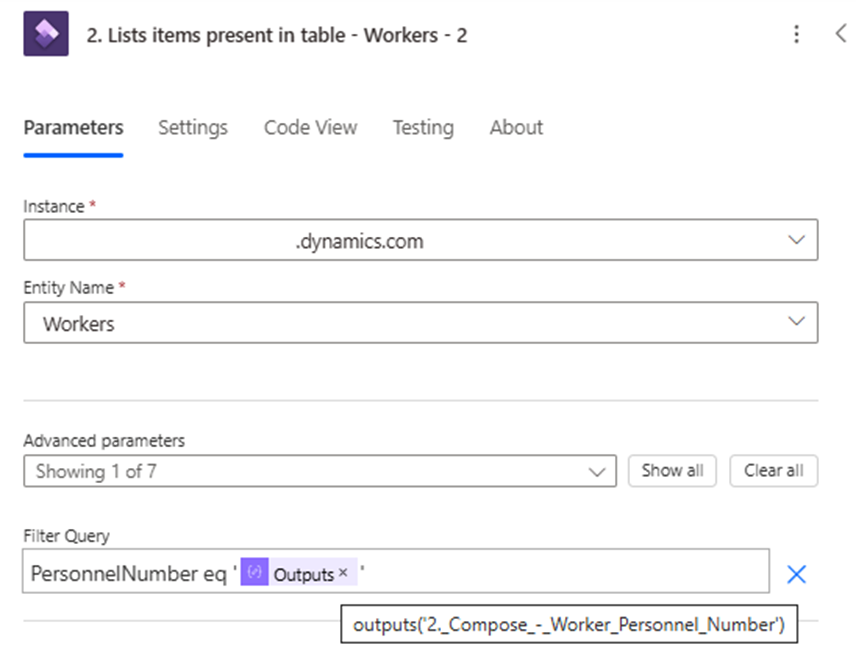
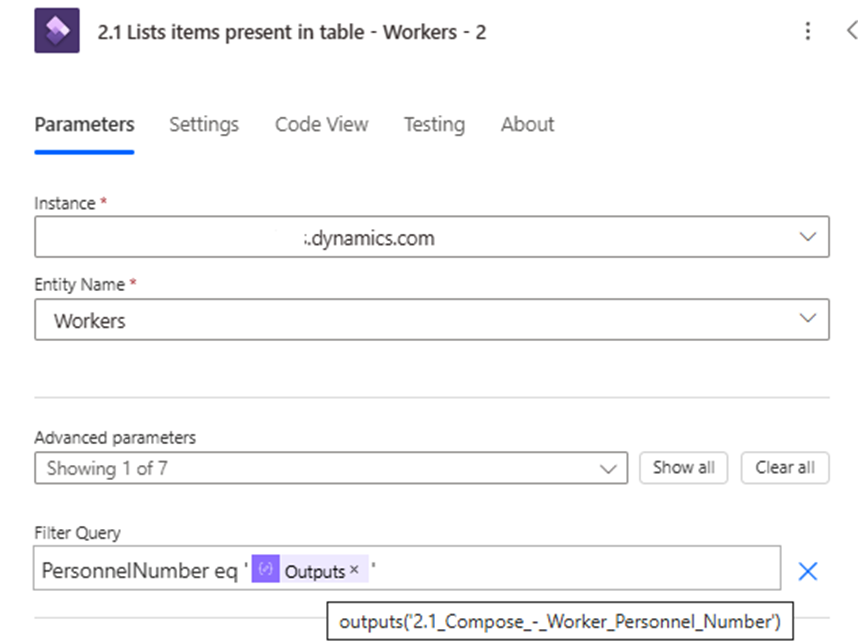
Step 5.11: List Item in Worker Table
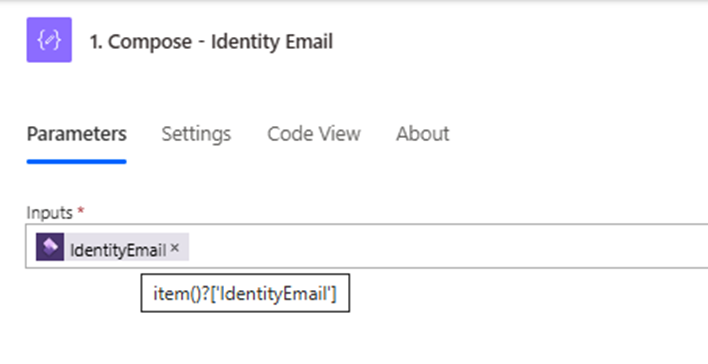
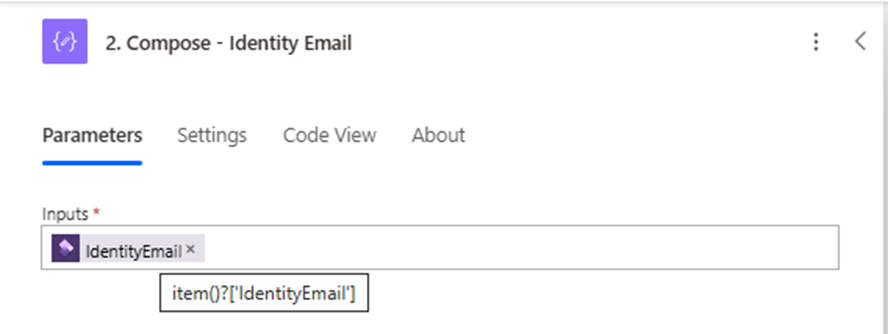
Step 5.12: Compose Identity Email
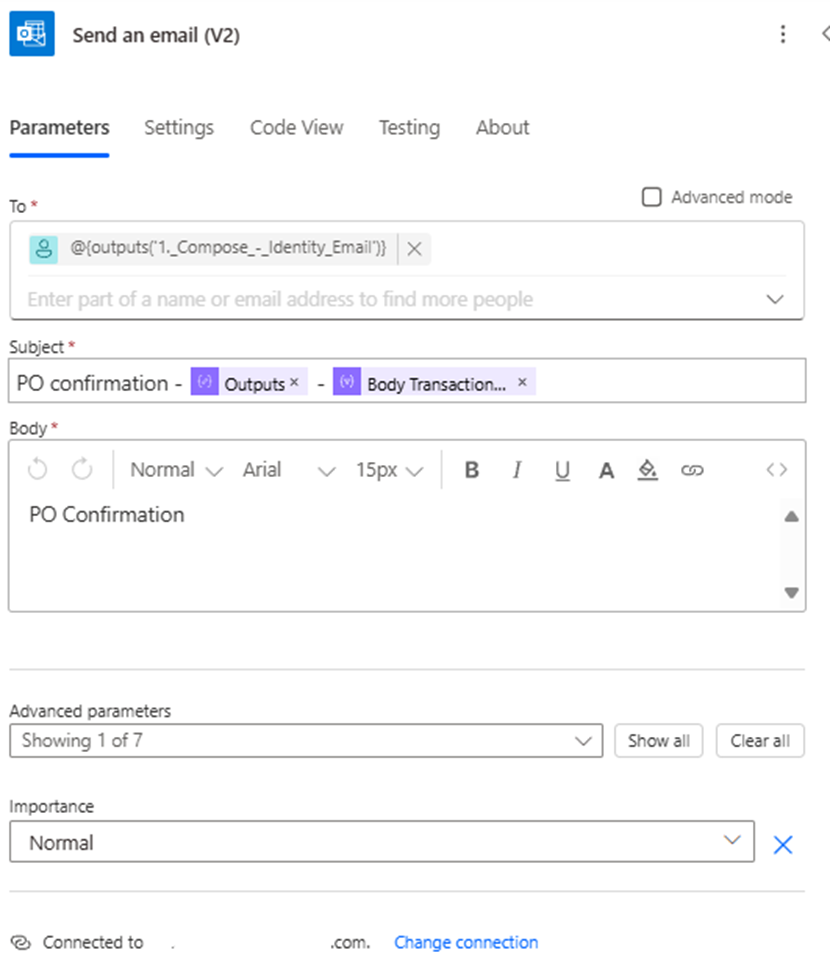
Step 5.13: Send an email to Identity Email
Director Notification
Step 5.14: List Item in Job Position Dual Write table
Step 5.15: Compose Position ID
Note – compose action will create foreach branch

Step 5.16: List Item in Position Table

Step 5.17: Compose Worker Personnel Number
Note – compose action will create foreach branch
Step 5.18: List Item in Worker Table
Step 5.19: Compose Identity Email
Note – compose action will create foreach branch
Step 5.20: Send an email to Identity Email
Conclusion
Implementing this automated approval process ensures that POs are reviewed by the appropriate managerial level, maintaining control over expenditures while leveraging Teams for efficient communication.
Expand Your Knowledge: See More Power Platform Blogs
Share this content:


Post Comment